|
| Image Credit: freeimages.com ID 1223590 |
Fellow genealogist, Shannon Combs Bennett, asked me to
participate in a writing life blog hop. It sounded interesting because it
allows the reader to get into the head of various writers so I agreed. You can
see who next week’s featured writer is at the end of this post.
So here goes.
What writing am I
working on?
Right now I’m primarily working on blog posts for my
personal blog, The Turning of Generations
and The In-Depth Genealogist as well
as articles for Going In-Depth, the
digital magazine published at The
In-Depth Genealogist. I also have two articles in the works for publication
in other magazines. A future project I plan to begin working on is publishing
my grandfather’s World War I letters. Since I want to include historical
background, this project will include quite a bit of research.
I am also regularly asked to give presentations on various
family history topics. It seems like I get one talk developed and almost
immediately begin working on another. The process to develop a talk is similar
to writing. The end product is just slightly different since it’s comprised of
a Power Point presentation and spoken words instead of written words. You can
see my presentation topics on the "Presentations & Workshops" tab of this blog.
How does my work
differ from others of its genre?
Since my interests are eclectic, my writing reflects this.
Why do I write what I
do?
There are a number of reasons why I write what I do. First
and foremost, I write about topics I enjoy and know something about which for
the most part is family history and genealogy. But there are other reasons I
write too:
- I write to learn. The process of writing about a subject causes me to learn more about it.
- I write to share what I’ve learned with others. It’s a way of giving back. I’ve learned from reading others writings so it makes sense to help others. Blogging is perfect for this.
- I write to get my research in order. The process of writing up a genealogical research problem or question, shows where the holes are in my research are which I can then work to fill.
- Finally, I write to preserve the stories and lives of my family and ancestors. It only take a couple of generations before they are lost if they are not written down and shared!
How does my writing
process work?
My writing usually begins with some sort of brainstorming
session using a mind map or an outline. I use an old fashioned composition book
as a combination planner, to do list and writing organizer so my outlines and
mind maps usually begin there. Sometimes my “outline” is a list. Other times it’s
a full blown outline. It just depends on the project.
Once I begin actually writing, I move over to either Word or
Scrivener depending on the project. If the writing project has a major research
component, Scrivener is an excellent tool because I can pull documents and
notes into the project for quick reference.
Now let's meet next week’s featured author.
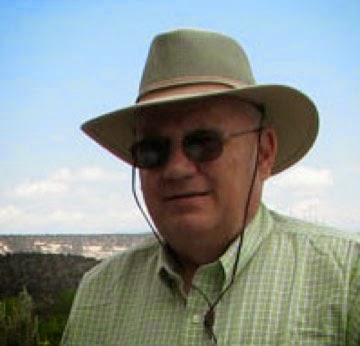
William Leverne Smith
aka "Dr. Bill"
William Leverne Smith aka "Dr. Bill" is an author,
writer, creator of "The Homeplace Saga" series of family saga
historical fiction stories, and an avid
reader, as well. His fiction is published in novels, novella, ebooks, and short
stories on multiple media platforms.
Dr. Bill is an active blogger at Dr. Bill Tells Ancestor Stories and non-fiction writer, as well. He has published five family history related
books and writes a monthly column as The Heritage Tourist in The In-Depth
Genealogist; he was an original contributor to this digi-mag.
One of his blogs, The Kinnick Project records the daily transcriptions of his mother's diaries, 75 years ago today.
Blog Hop History
This particular
blog hop started in April 2014 by Ellen Barone on The Internal Traveler. If
you follow the links backwards you will see a wide variety of writing genres represented. If you Google “Blog Hop Ellen Barone” you can
see a sampling of what I am talking about. Also, you can read the post Shannon wrote on her blog and the other writers she featured there too!
URL for this post: http://turning-of-generations.blogspot.com/2014/06/the-writing-life-blog-hop-june-30-2014.html
© 2014, copyright Michelle Goodrum